Live 11 is out with tons of exciting new features to boost productivity and creativity. Today, I want to share a new feature to create racks presets in Live 11. You can use this technique for anything really. For example, you could create a rack to store your favourite drum samples and create different presets per genre, like this one below.
I will show you a step by step guide to creating your own personalised mixing tool rack and I will also share how to fit the presets in my workflow.
First of all, let’s get the audio effects we need!
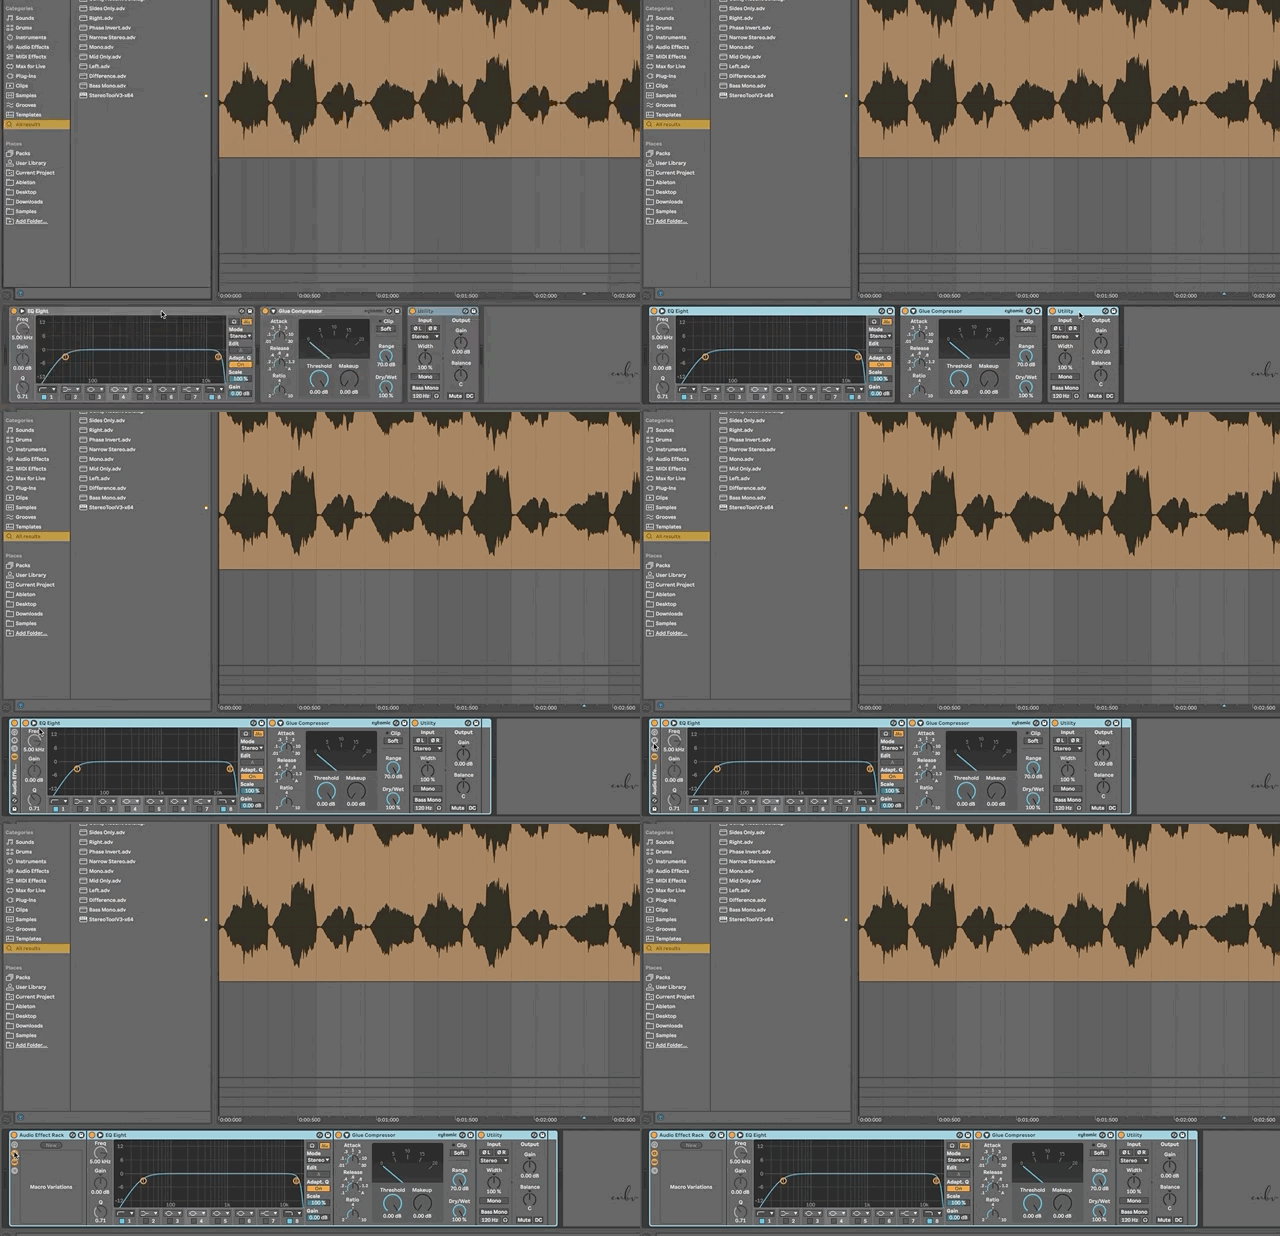
- Create an audio track CMD-T or CTRL-T.
- Drag and drop the following effects: EQ8, Glue Compressor and Utility
- Now select all the audio effects and press the key combo CMD-G or CTRL-G.

Perfect, now the fun starts! I will show you how set-up the rack for my needs but you can do whatever you want and you can also add your favourites audio effects!
- In EQ8, choose a low cut filter for the first band and a high-cut filter for the last band.
- Right-click on the frequency knob on the first band and select ‘Map to Macro 1’.
- Right-click on the frequency knob on the last band and select ‘Map to Macro 2’.

Let’s move to the glue compressor and follow the same steps.
- Right-click on the threshold knob and select ‘Map to Macro 3’.
- Right-click on the gain knob and select ‘Map to Macro 4’.
Finally, let’s map the Utility device.
- Right-click on the gain knob and select ‘Map to Macro 5’.
- Right-click on the mono button and select ‘Map to Macro 6’.
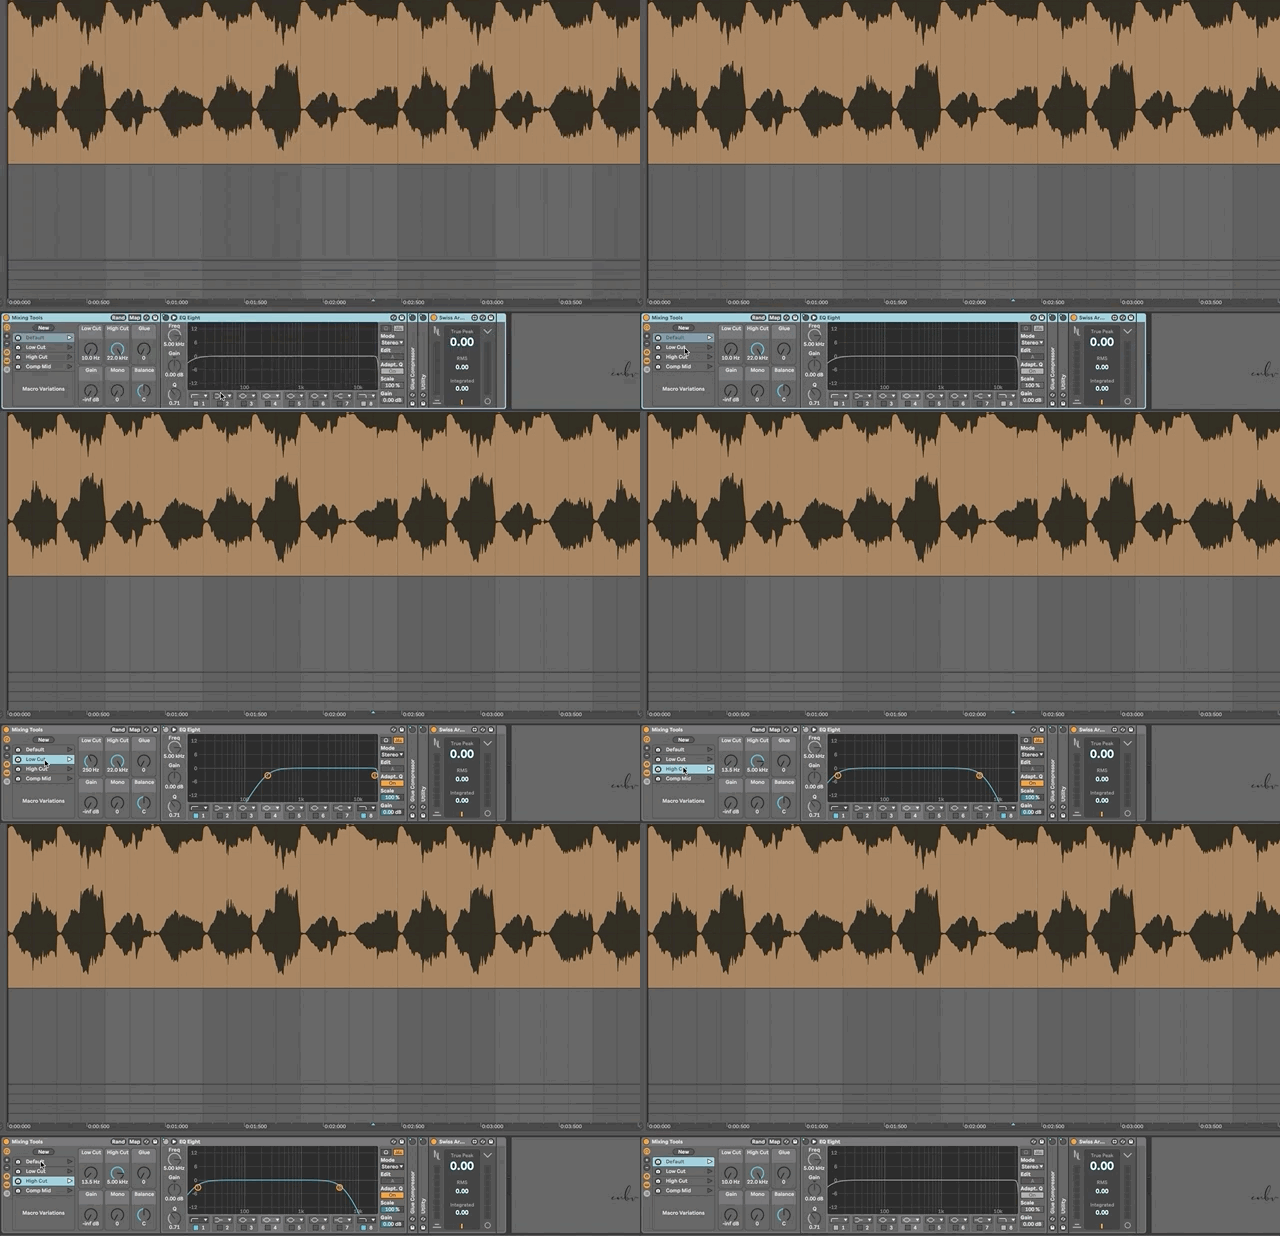
Now that all the mapping is done, it’s a good idea to rename each Macro to remember what we mapped. The next step is creating the presets.
- Press the new preset icon on the rack.
- Press the ‘New’ button.
- Now adjust the macro to suits your needs. I usually need low and high cuts easy to access.
- Press the preset icon with a plus
- Done! The preset is saved and now you can rename it with emojis and other stuff.

I’ve attached my rack for you! Have fun and keep creating!👋
